Tuesday, April 23, 2013

KCW Spring 2013 - Day 2

I fully intended to knock out my hour of sewing while the girls were at preschool this morning.
But I crawled back into bed and ended up sleeping until it was almost time to pick them up!
I did manage to squeeze some sewing time in this afternoon.
This one was T's choice. She wanted me to lengthen it into a dress. The pattern is from Sewing MODKID Style: Modern Threads for the Cool Girl. And the fabric is from Girl Charlee.

KCW Day 2 halter top2
KCW Day 2 halter top3
I had to bribe her to model for me. And to her credit she threw herself into it.
KCW Day 2 halter top1

Monday, April 22, 2013

KCW Spring 2013 - Day 1

This week is Kids Clothes Week!
This morning I got the ball rolling with this dress:


KCW Spring 2013 Day 1 Dress by Tea&Dahlias
I took out a bunch of different fabrics and patterns this morning when it was just Dahlia and I awake. She picked out this fabric and a pattern from my collection of patterns. Dahlia only wore it for a few minutes before she wanted to change. T has been wearing it since. I absolutely adore the bow at the back.
KCW Spring 2013 Day 1 Dress by Tea&Dahlias
Unfortunately I'm going to have to change the straps to bias tape straps. The grosgrain ribbon just didn't hold up to playing at all.You can see that here if you look where the strap joins the dress.
Broken Strap :(

Saturday, April 20, 2013

Kids Clothes Week is coming!

It's time for Kids Clothes Week! It seems I miss it every time it's on. Either I find out too late or it doesn't work with my schedule. This Spring it's April 22nd-29th.
I'm so excited to be able to participate this season!

On my last trip to Ottawa I managed to get to Fabrications and picked up a couple great pieces of fabric that I'm excited to turn into some sweet summer dresses.


I'm going to make the Oliver+ S Ice Cream Dress. Plus I have a bunch of knits I want to work with.
I'm so excited!


Thursday, March 28, 2013

Paleo Burger night

My friend Adrian started eating Paleo about a week before I did. I didn't know this until after he found out I'd made the switch too. He's in need of some food-inspiration.

Last night I made burgers for the family. The burger itself is just ground beef formed into a patty. Instead of having a bun (since grains are a no-no on Paleo) I put my burger on top of a portabello mushroom cap. Topped with Homemade mayo, a slice of tomato, some homemade guacamole and caramelized onions. It was phenomenal.

Mayonnaise is a finicky thing to make. If you try it and it doesn't work take some deep breaths and try again. Homemade mayo is far superior to anything you can get in the store. It is well worth the time and effort.

Mayonnaise (Paleo friendly):

2 egg yolks
2 tsp lemon juice
1 tsp apple cider vinegar
1/2 tsp dijon mustard
pinch of salt
3/4 cup olive oil

1. Whisk everything except for the olive oil together until well combined.
2. VERY slowly drop the olive oil in while whisking hard. If whisking by hand it's easier to have someone else slowly drizzle it in. It should take 5-7 minutes to drizzle that much olive oil in. If you go too fast you'll break the emulsion. Keep whisking until it reaches your desired consistancy.
3. (Only applicable if you are whisking by hand) Go get a KitchenAid.


Wednesday, March 20, 2013

Making the Choice: Paleo

Farmers Market Beets

Alright, in blatant contrast to my previous post on gumdrops, I've decided to go Paleo.
I've been feeling the effects of the traditional American diet. Fatigue, weight gain, headaches.
I made this decision a reality about a week and a half ago and have already noticed a tremendous improvement in my mood, energy and productivity.

What is Paleo?
My 4 year old will happily tell you that I now Eat Like a Dinosaur. Focusing on foods that are minimally processed, with particular emphasis on Meat, Vegetables and Fruit. Processed sugar is off limits, while more natural sources such as maple syrup and honey are ok in small quantities. There seems to be some debate on the allowance of dairy. I'm personally going with a more limited restriction of it until it is out of my system and I can reintroduce it and feel how it effects me.
Grains and legumes are out. I already know from previous stints with going Gluten-free that passing on grains makes me less lethargic and keeps my guts happier.

Why am I doing this?
I've been noticing my energy disappearing and my waistline expanding for a while now. I want to change that. At the same time, I've found that when I am strict with myself I'm more apt to fail. What this means is that I'm not going to beat myself up over any slips. That said, I'm making informed decisions and learning more about how these foods make me feel. Finally taking notice of how my diet effects my mood is all the feedback I need to keep going in the right direction.

Yesterday I slipped. The girls and I had some gummy worms. I ate about a quarter of the amount I would have eaten in the past. The rest of the afternoon I felt awful in comparison to how I've been feeling since I started. Reinforcement like that is more than enough to keep me on track.

Thursday, March 7, 2013

Gumdrops


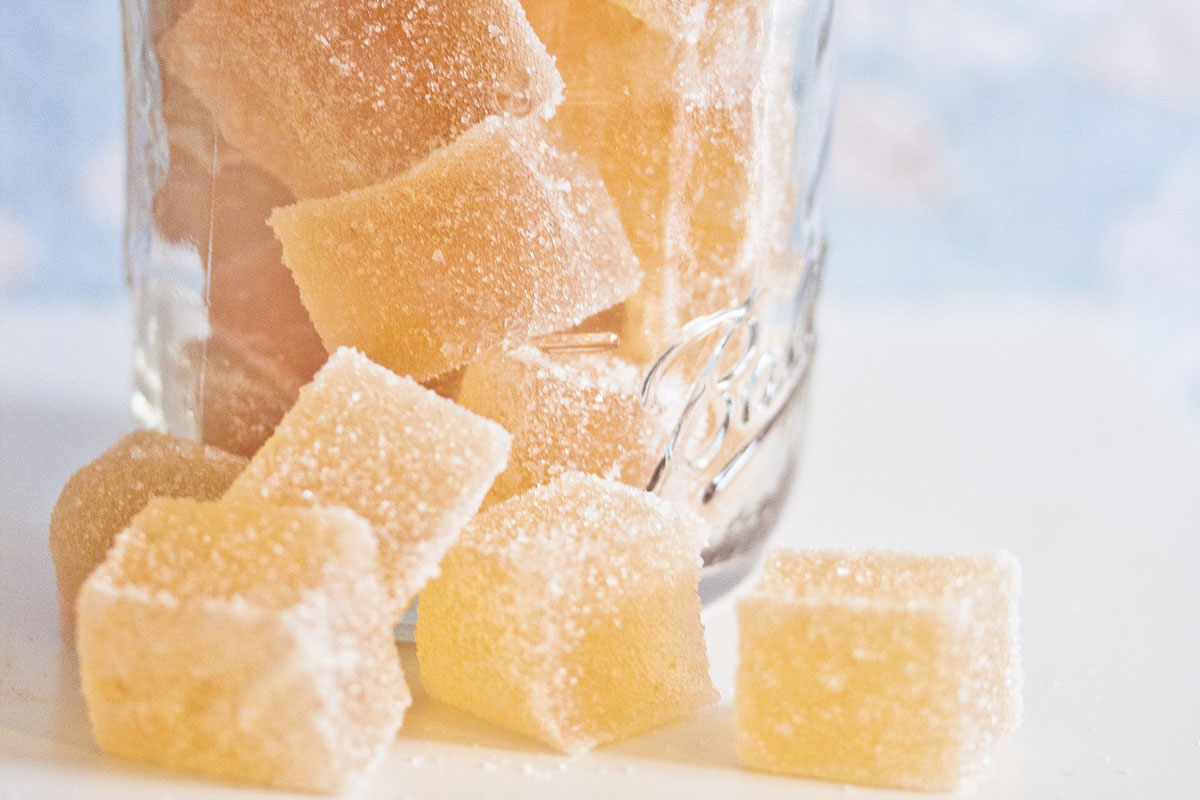
I love gummi candies. It doesn't matter what shape. Bears, worms, frogs, I'll eat them all. I even once ate an enormous gummi rat. When I found a recipe for them I was so excited. I've altered it a bit enabling me to make some really great flavors. These ones are cheesecake, rootbeer and raspberry flavors.

Gumdrops Ingredients:
1 cup cold water
1/4 cup gelatin
1 1/2 cups boiling water
4 cups sugar + extra for coating approx
1/8 tsp candy oil (like Lorann Oil's) per pan
food coloring

Bloom the gelatin in a dutch oven by sprinkling it on top of the cold water. Wait 5 minutes.
Add the boiling water and stir until the gelatin is dissolved. Stir in the sugar. Bring to a boil over med-high heat and boil for 20 minutes.
Ladle mixture into pans. Divide mixture between 3 5x7 pans. Add 1/8 tsp of candy oil and a few drops of food coloring to each pan. Stir to combine.
Refrigerate, covered, overnight.

If using silicon pans the gummi should pop out easily, if using a rigid pan like I do loosen the edges by running a knife around the sides of the pan, then peel the gummi off the bottom. It helps to sprinkle some sugar on the outside as you peel it off so it doesn't stick. Cut into shapes and coat with sugar. The recipe this is based on says to let them sit at room temperature for 2 days before eating them. They've never lasted that long, they are way too good fresh!


Wednesday, February 6, 2013

Macarons

My brother got married a couple weekends ago. We flew to Seattle WA, rented a car and drove the rest of the way to the suburbs of Vancouver BC.

As one of the bridesmaids, the morning of the wedding, I got to enjoy and amazing breakfast at The Little White House in Langley BC. They had and amazing platter set out for us that included some French Macarons. Very few of the others there had heard of them but my mouth was watering as I raced through the other goodies in anticipation of trying one. They were fabulous!

I went back a couple days later and bought several more. I've been debating trying to make them myself for a while now and those few that I had solidified my resolve.

For my first attempt I decided to use just the most basic recipe from Not So Humble Pie. They turned out great! To fill them I made a simple buttercream icing and added flavor with some honey-butterscotch sauce I had left over from making ice cream the other day.

I can't wait to try other flavor variations!

Saturday, November 17, 2012

Cutting Knit Fabric

I have sewed many dresses for my girls. For some reason or another they never get worn. It wasn't until I started working with knit fabric that they started to pick clothes I've made to wear everyday. One dress in particular I had to make twice because I couldn't coax Tea out of it. There was a bit of a learning curve though. Trying to cut knits was near impossible for me until I figured this trick out. Ditch the scissors. But using a cutting mat and a rotary cutter I don't accidentally stretch the fabric while I'm cutting. Using pattern weights to keep the pattern pieces in place help, but I use whatever I have on hand. Usually my cell phone and a Quilter's ruler will keep my pieces in place. I definitely recommend trying this trick. It's well worth it.

Thursday, November 1, 2012

Hurricane Sandy

Last year I had to evacuate my home. Irene came through and flooded our basement with over 5 ft of water. We lost a lot in the flood last year. Mostly things that were replaceable but a few things that were not.
Flooding7

This past Sunday, with the threat of another Hurricane looming, I pack up the girls and headed north, to Canada.
Monday was spent in my pajamas watching the news unfold online. It was very emotional to be stuck, helpless, watching the area I have come to call home get devastated.
My father in law is in an area that isn't expected to get their power restored for another 2 weeks. We don't know how long it will be before we see power at our house either. Our neighbor has let us run an extension cord to our fridge from his generator.
As sad as I am that we can't return home for a while yet, my heart goes out to the people who lost everything. 
It wasn't until I experienced it that I realized just how awful the experience of flooding is. Where a fire is the heart attack of homes, a flood is like a slow cancer that you see coming but are helpless to do anything to stop.
I have been trying to simplify our home. I'm going to take this opportunity to purge and donate.

Sunday, September 30, 2012

Sewing time

This morning I dragged the family out to the bookstore and picked up Sewing MODKID Style: Modern Threads for the Cool Girl. It was the only book on the shelves that covered sewing with knits, and it's EXACTLY the sort of things I want to be sewing. I've decided I need to overcome this irrational fear of knits.
I couldn't decide which thing to make first. I started with the headband pattern, made it in a solid lilac color. Tea wore it for most of the day. Then I made leggings in an aqua striped jersey I've been saving for leggings. Turns out there was enough to use in a matching "swim suit cover up". I made it in a solid interlock with jersey sleeves and pocket. 
This is the first time I've made something and she's been excited to wear it. She asked for another one in pink. A few changes I'll make next time though. She doesn't want a hood. I want her to have something long sleeved. Fortunately the front and back pattern pieces are also the same pieces for several other patterns in the book. This makes it really easy for me to just swap around pieces. 

There's also a pattern in the book for a swimsuit. Dahlia has already requested one in black, another in purple and one in green... I'll be busy. 


Wednesday, September 5, 2012

Tomato Jam

The first time I had Tomato Jam was at a BK Swappers food swap. We did a potluck BBQ and this jam moved so fast. So this weekend when I scored a crate of plum tomatoes (50lbs for $20!!!) I knew it would be on the list of things to make. We went through a 4oz container the first night, pairing it with crusty bread, fresh mozzarella and prosciutto. 

The recipe I used was based on one from Food in Jars
Here is the Original Recipe I had to take out the red pepper flakes because I'm sensitive to them and I omitted the ginger because my husband hates ginger.

Tomato Jam
5 lbs tomatoes, finely chopped
3 1/2 c sugar
8 T lime juice
1 t cinnamon
1/2 t ground cloves
1 T salt

Mix everything together in a large pot. Simmer until the consistency is like jam. It will be very liquid at first. It took me about 2 hours to get it to the consistency I wanted. In the meantime wash the canning jars with warm soapy water. Rinse thoroughly. Put your rack in the bottom of the canning pot, and fill with water, add the jars. Heat to boiling. Put a towel down on your counter so the jars don't crack touching the cold counter. Remove jars when jam is ready. Heat a small saucepan of water to boiling, put the lids (not the rings) in and turn the heat down to low. Fill the jars, leaving 1/4 inch headspace. Wipe the rims with a clean cloth. Apply a lid and ring to each jar, tighten only fingertip tight. Process in the boiling water canner for 20 minutes.
Turn off the heat and wait 5 minutes before removing the jars and putting them on the towel.
Yield - it really depends on how much you boil down the jam. I got equivalent to five 8oz jars.

This stuff is fantastic on burgers, or just a piece of bread.


Tuesday, September 4, 2012

Slime Time!

This weekend was a busy one!
At the farmer's market I put my name in for a crate of Plum Tomatoes for next week only to get the call mid-afternoon that they had one ready for me to pick up! I promise to post details of what I did with them over the next few days. Right now I want to show you how I kept the girls entertained while I prepped the kitchen for my marathon canning session.

We made slime! It was fairly simple to do, the girls loved it! The texture of this stuff is neat. It can crumble. It also sort of melts. If you roll it into a ball it'll bounce like a rubber ball...
And T thinks it's pretty convincing as snot.

Slime recipe:
1/2c water
1/4c clear glue
1T borax
food coloring in your choice of color

To make put about half of your water in one container (easiest if it has a lid), add the borax. Shake it. In a separate container put the remaining water. Color the water whatever color you want your slime to be. I used two drops each of green and yellow. Add the glue. Mix thoroughly. Slowly, a few drops at a time, add the borax solution. Add a few drops, stir, lift out your stir stick and see your progress. Add a few more drops, stir, repeat. We managed to incorporate all of our glue mixture into our slime.


We played with it again this morning, I stored it in a little jar with a lid. It all sort of melted into one blob in the container. And once I pick up all the little pieces the girls chopped it into this morning it'll do that again.


Friday, August 17, 2012

Fried Chicken

The only time I'd ever had fried chicken, before last night, was at a fast food joint. I was never a fan.

When my Bon Appetit magazine arrived back in February, and it had Fried Chicken on the cover, I tossed it aside filing the idea under "Maybe"

Last night I made it. I took a few pictures while Justin dove in.
When I finally took a bite I realized that I'd been missing out. For my entire life.

It was surprisingly easy to make. I highly recommend it!
Here is the recipe


Tuesday, August 14, 2012

DIY Air and Carpet Freshener

I'm not a big fan of the air fresheners you buy in the store. The scents they offer don't always appeal and they are full of chemicals.
Instead I make my own. This same recipe can be sprinkled on carpets for a carpet freshener. (To use that way, sprinkle on carpets wait a bit and then vacuum it up. It won't harm your carpets, so go ahead and do other stuff and vacuum it up when you get to it. I usually wait 15 minutes, but I've been known to forget about it for up to a couple hours.)

Air Freshener

To make this you'll need:
Baking Soda
Essential Oil(s) or Fragrance Oil
A Jar (see note)
A scrap of fabric (see note)
Scissors

Notes: I like to use a mason jar so I can use the ring to secure the fabric, but any jar and an elastic would work.
Sheer fabric works well, you don't want to use anything too tightly weaved or your fragrance won't penetrate it.

 Mix enough baking soda to fill your jar 3/4 full with several drops of oil. The amount will obviously depend on what size jar you use. I used a 4 ounce jar and about 10 drops of fragrance oil.

Put mixture in the jar. Cover the jar with fabric. Secure with the ring or elastic. Trim the extra fabric. I used pinking sheers to prevent fraying.


Leave out on a counter, shelf, where you want to make smell better. I have one in my bathroom and one in the kitchen.

Carpet Freshener

We only have one room in the house that's carpeted. The girls' room. I like to make this with lavender essential oil for them. Lavender known for it's calming and soothing properties. It's often used in scent blends design to help relax.

To make it as a carpet freshener simply skip the steps about finding a pretty jar and fabric. Mix baking soda and fragrance together. Sprinkle over carpets. Wait a while, give the powder time to work, 10-15 minutes is plenty, longer is better. The baking soda will help deodorize the carpet and the fragrance you choose will scent the entire room. Vacuum up the powder.

When experimenting with your own carpet freshener, I would recommend only lightly fragrancing at first, until you know what your preference is. If you use too much oil it can be over powering.


Monday, August 13, 2012

Saturday, August 11, 2012

Thursday, April 12, 2012

Tent

Chopping down the most prolific plant ever (Rose of Sharon. If you're thinking of planting them don't... seriously....)


Those are just last year's volunteers. There are literally dozens of these grown to about 8 ft tall around the perimeter of my yard. I've been chopping them down. With the resulting branches I decided to make tents for the girls.

Tent

I just lashed four branches together for each one, and then draped fabric over the branches. I'm planning on getting a bit more fancy with the fabric and adding buttons (Trillian asked to be able to close hers) and ribbons (To tie them to the branches.) The fabric comes inside when we're done playing since I don't want it to get ruined by the elements.

They loved them. T told me to leave her alone so she could take a nap.
Leave Me Alone

Wednesday, April 4, 2012

Happiness

I'm always happiest when I have a project I'm working on.
Right now I'm working on developing a bunch of donut recipes.
So here is my interpretation of happiness:
Almond donut drizzled with honey

Chocolate donut with peanut butter glaze

Lemon donut with Raspberry glaze


Check out our blog circle by going to http://www.laceybphotography.blogspot.com/

Sunday, April 1, 2012

DIY Tanglefree headphones

I made this video for Modcloth's DIY Boss contest. It was a lot of fun to make! I might do a few more to put here.