I love granola. Its one of those staples that's so easy to make! Customizing it is a great way to mix things up for breakfast.
Since I had a lot more of the vanilla syrup than I could conceivably use in coffee (as only an occasional coffee drinker) I knew I wanted to use it in some homemade granola.
Vanilla - Almond - Cherry Granola
Ingredients
3 cups old fashions oats
1/2 cup coconut
1/2 cup sliced almonds (slivered would work too)
1/2 cup cherries
1/2 cup vanilla syrup (or honey)
Preheat oven to 300F Mix the oats, coconut and almonds in a large bowl. Add syrup and toss to coat. (Or stir with a spoon) spread on a cookie sheet. Bake for 30 minutes, stirring every 10 minutes to ensure an even toast. Mix in cherries and allow to cool before packaging in an air tight container.
Friday, December 30, 2011
Thursday, December 29, 2011
Vanilla Syrup
Earlier this year my father spent a month in India. When he came back he sent us a package that had some wonderful scarves, fabric and dresses for the girls.
He also sent a vial with two vanilla beans.
I LOVE vanilla, but I've always been scared to work with vanilla beans. They are so expensive and what if I mess it up??
I recently was looking at recipes on pinterest and one caught my attention. I can't even remember what the recipe was for but in the article they mentioned that you can buy vanilla beans in bulk and save money.
Needless to say I was googling within minutes. I found www.beanilla.com and immediately ordered 25 beans. (They take paypal, that's something I can really appreciate.)
Finally today I decided to try making a simple vanilla syrup. This stuff tastes AMAZING. Waiting for it to cool I've come up with several things I want to try it with.
In my coffee, tea or hot chocolate?
Rootbeer + vanilla syrup + vodka?
Vanilla syrup as the invert sugar in my homemade granola?
Without further ado, here is the recipe:
Vanilla Syrup
2 1/2 cups sugar
2 1/2 cups water
2 vanilla beans
Combine the sugar and water over low heat, stirring until sugar is dissolved. Split the vanilla beans in half the long way. Scrap out the black paste on the inside and stir it into the syrup, add the bean itself. Keep over low heat to encourage the steeping but DO NOT BOIL. (You don't want to reduce the water too much or your syrup will be too thick.) Steep for 30 minutes. Stirring occasionally (I stirred far more than that because I couldn't pry myself away from the fragrance.)
Monday, December 26, 2011
Saturday, December 24, 2011
Peppermint Bark
I made peppermint bark to include in christmas gifts this year.
I loved the look of the empty tray.
Peppermint Bark
4 Candy canes
1 bag Dark chocolate chips
1 bag white chocolate chips
Crush the candy canes by putting them in a freezer bag and either rolling over them with a rolling pin or beating them with a mallet/rolling pin/baseball bat/whatever you have to beat things with.
Melt the dark chocolate, 30 seconds at a time in the microwave, stirring after each 30 second interval. It's ready when it's spreadable - do not over heat, you can burn chocolate.
Spread on a cookie sheet lined with wax paper. sprinkle a little bit of the smallest pieces of candy on top. Put in the fridge for 5-10 minutes to harden.
Melt the white chocolate the same way you melted the dark chocolate. Spread on top of the dark chocolate. Sprinkle the rest of the crushed candy canes on top. Press the larger pieces in to ensure they stick.
Refrigerate until firm, break into pieces.
When peppermint bark is made with chocolate chips it needs to stay in the fridge lest it melt. (I prefer to eat it cold anyway)
Enjoy!
Tuesday, December 20, 2011
Brussels Sprouts
Recently I heard someone say "Don't cook your Brussels sprouts with pancetta..." They went on to talk about roasting them. In the past year I tried that for the first time and it was fantastic.
Growing up with only ever eating them boiled, just roasting them was a revelation. Even my husband will eat them now! Adding pancetta? That sounded downright dreamy.
Shortly there after we were out for dinner at one of my favorite BBQ places. Their side dish of the day was Brussels Sprouts with bacon and scallions.
One mouthful and I knew I had to try making them.
Ingredients:
5 slices of bacon
1 medium onion
2lbs Brussels sprouts
1/4 c water
Using kitchen scissors, cut the bacon into small strips. Fry the bacon until just cooked (don't over crisp it at this stage). Chop onion, halve Brussels Sprouts. Scoop bacon bits onto plate lined with paper towel. Fry onion in the bacon grease. once it starts to turn translucent add Brussels sprouts. Add water and cover. Cook for 5 minutes over med heat. Remove cover. Stirring occassionally, cook until the sprouts are tender and part are starting to brown. Add bacon. Fry one minute more. Remove from heat, and serve.
Monday, December 19, 2011
Pumpkin Pancakes
Last night my friend stayed the night. We were up until the wee hours of the morning watching Iron Chef America. I love watching that show because there are so many things where I'm on the edge of my seat ready to lick the television. At the same time there are many dishes that leave me shocked (and grossed out - trout ice cream anyone?)
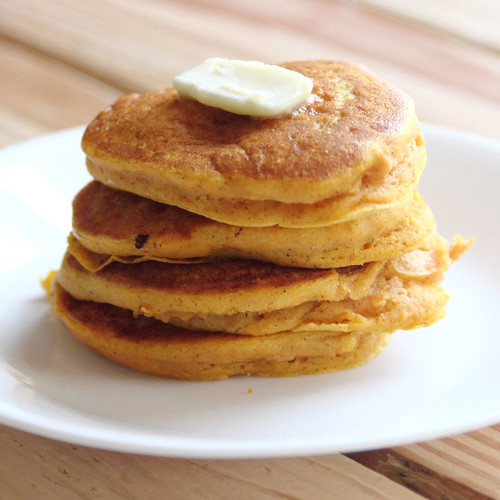
My husband refuses to eat anything from the squash family. I love pumpkin. So this morning I was able to make pumpkin pancakes without feeling obligated to eat them all myself.
Ingredients:
1 1/2 c milk
1 c pumpkin puree
1 egg
2 T vegetable oil
2 T vinegar
2 c all-purpose flour
3 T brown sugar
2 t baking powder
1 t baking soda
1 t pumpkin pie spice
1/2 t salt
Mix together all the wet ingredients (milk, pumpkin, egg, oil, vinegar). Mix together the dry ingredients. Add the dry ingredients to the wet ones. Stir until combined but don't over stir.
Scoop about 1/4c onto a hot griddle or pan. Brown on both sides. Top with butter. (bonus points if it's homemade butter)
I still have a bunch left over so I'm going to freeze them for future use.
My husband refuses to eat anything from the squash family. I love pumpkin. So this morning I was able to make pumpkin pancakes without feeling obligated to eat them all myself.

Ingredients:
1 1/2 c milk
1 c pumpkin puree
1 egg
2 T vegetable oil
2 T vinegar
2 c all-purpose flour
3 T brown sugar
2 t baking powder
1 t baking soda
1 t pumpkin pie spice
1/2 t salt
Mix together all the wet ingredients (milk, pumpkin, egg, oil, vinegar). Mix together the dry ingredients. Add the dry ingredients to the wet ones. Stir until combined but don't over stir.
Scoop about 1/4c onto a hot griddle or pan. Brown on both sides. Top with butter. (bonus points if it's homemade butter)
I still have a bunch left over so I'm going to freeze them for future use.
Saturday, December 17, 2011
Saturday Morning Breakfast
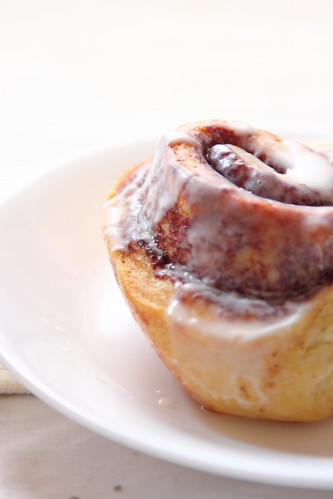
Cinnamon Buns
Unfortunately there was bad news this morning too.
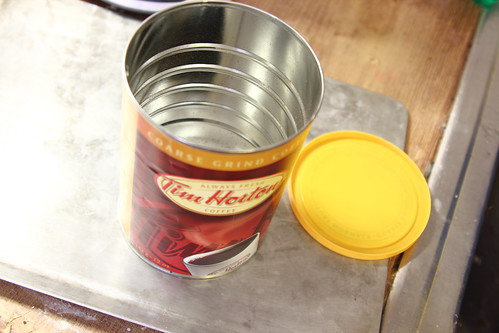
But I guess that's the problem with being expatriated.
Thursday, December 8, 2011
Wednesday, December 7, 2011
Christmas Ornaments with Kids
Hurricane Irene took our Christmas Tree and all our ornaments in the flooding she left behind.
It's a blessing in disguise because we really need to build a collection of ornaments that are OURS and not what either of us ended up with from our previous lives.
I like the idea of a coordinated tree. I love the shop displays that have a tree with only one or two different colors of ornaments on them. But I also value handmade... I came up with an idea to help keep my tree looking sharp, while still remaining a tree with handmade ornaments.
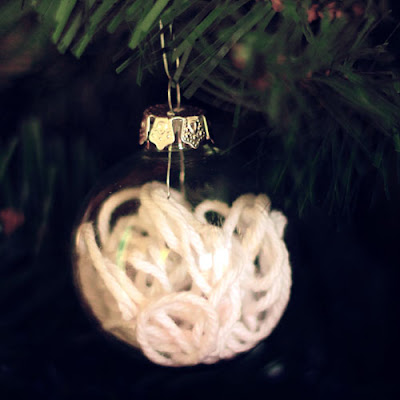
I have a WIDE variety of crafting supplies and sewing notions. So I picked up some clear glass ornaments. (8 for $2.99 was very affordable!) And I raided my stash (and my friend's stash) for white things that would fit inside.
T had a blast helping me put things in the ornaments. She happily put beads in one of them one at a time. Kept her busy long enough for me to make several others!
Pipe cleaner - be careful with these. If your pipe cleaner is too stiff it will poke a hole in the glass.
Beads - this was a great way to keep T busy while I made others.
Feather - this one is my favorite by far. It's just a single craft feather.
Ribbon - I chose a wide satin ribbon, but it would look cool with a thinner one too!
Zipper - I had to use a zipper with a small head, the other one I had wouldn't fit.
Yarn - I fed cotton yarn into the ball until I was happy with the look then I cut it. Rather than cut a length and have it be too short.
Eggnog Marshmallow fondant
This week I had some leftover EggNog Marshmallows (I make marshmallows over here)
I took three of them and popped them in the microwave for 20 seconds and then stirred in enough icing sugar to make them kneadable. (about 2/3 cup) Kneaded until smooth. wrapped in plastic wrap and stored in the fridge.
Et Voila!
Egg Nog flavored fondant!
If you don't have EggNog flavored marshmallows on hand (I mean who does normally?) You can make other flavors using store bought marshmallows, food coloring and extracts.
Tuesday, November 29, 2011
Crocheted Pillowcase
T is really into pink. She pretty much refuses to wear any of her clothes that aren't pink. But her room suffers from a severe overdose of pink. I'm trying to tame it while keeping her taste in mind as well.
I found this light blue fabric with sparkles, unicorns, rainbows and pink stars. I knew it was perfect for her.
The glitter made the texture weird and I wouldn't want to sleep with my face on it, so I used a softer solid teal for the main part of the pillowcase and some vintage rickrack from my Grandma's stash to combine them. I love the added detail of crochet trim, so I did a simple shell stitch around the outside.
She loves it so much, when I told her I was taking pictures of it she insisted on pretending to sleep on the couch with it. She was even fake-snoring.
Monday, November 21, 2011
Cake Pops
This weekend we celebrated the girls' 2nd and 3rd birthdays. Because the space we were using was going to be full of 2-4 year olds, we opted to avoid the traditional cake. I didn't want to deal with the mess.
Cake Pops were the perfect solution! These ones were made with a special baking pan, rather than mush up cake with icing. Strawberry cake with Pink candy melts. Perfect for my pink-obsessed little girl.
Cake Pops were the perfect solution! These ones were made with a special baking pan, rather than mush up cake with icing. Strawberry cake with Pink candy melts. Perfect for my pink-obsessed little girl.
Wednesday, November 16, 2011
Pot Roast - What to Eat Wednesday
When I was younger I was given 3 slow cookers in the span of one year. I don't think I ever actually used one until I had kids. Now my slow cooker is one of my best friends.
This week I'm making a Pot Roast.
I'm not usually a leftovers eater. But there are a few exceptions. Pot roast leftovers are fantastic in a quesadilla, on french fries with cheese or in a pot roast pie.
Here is my tried and true Pot Roast recipe
Ingredients:
1/4 cup flour
3-4lb Roast
4-6 small potatoes, washed
1 onion
4 carrots, peeled
2 cloves of garlic minced
1 cup tomato sauce
1 cup beef broth
1 bay leaf
1/2 tsp dried thyme
Directions
Prep the roast by patting it dry with paper towel and rubbing flour all over it. Brown the outside over medium heat for a few minutes until all the sides are brown. (use a wooden spoon to help flip it)
Put the roast in the slow cooker. Quarter the potatoes and onion and add to the slow cooker. Cut the carrot into bite sized pieces and add to the slow cooker. Add everything else.
Cook on low for 10-12 hours or on high for 6-8 hours.
Cut pot roast into serving sizes, or shred with a fork and put back in the slow cooker. Cook on low for another hour or two.
Monday, November 14, 2011
Saturday, November 12, 2011
Salt Dough Ornaments- Saturday's Activities
When Hurricane Irene came through we lost all our christmas decorations. I've decided that it's far more meaningful to make decorations and trade homemade decorations with friends than it is to buy decorations.
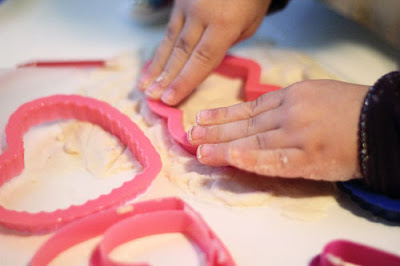
Salt Dough is a cheap and easy way to make ornaments. And it's lots of fun to include the kids!
To make Salt Dough
1 cup of Flour
1/2 cup of Salt
1/2 cup of water
Stir until a dough forms, knead for 5 minutes until the consistency of playdoh.
Roll out and cut dough into desired shape.
Bake at 200F for 5 hours. (I flipped mine after 3 hours)
Friday, November 11, 2011
Wednesday, November 9, 2011
Butter and Buttermilk Pancakes
I recently tried making butter for the first time. I have to tell you, I was skeptical. Now that I've figured out how easy it is, I'll be doing it as often as I need butter. It saves me a little bit of money, but is worth it based on deliciousness alone. Especially since it gives me an excuse to make fresh buttermilk pancakes. Both recipes are posted here. The butter is something I recommend making when you have other helping hands available.
Fresh butter
Butter
Ingredients
2 cups heavy cream (aka whipping cream)
cold water
Directions
Fill a one quart canning jar (with a tight fitting lid) with the cream and put the lid on. (Honestly, filling any size jar half full with cream will work) Let it sit at room temperature for 2 hours.
Start shaking it. Shake it until you can't shake anymore and then get your helping hands to shake it. Keep going until it separates into buttermilk and butter. If you're not sure if it's separated yet, keep shaking. when it's ready it will look like a jar you've put 1 cup of butter and 1 cup of skim milk in.
Strain the buttermilk (save it - you'll need it for the pancakes!). I found the easiest way was to put a piece of cheesecloth in the sealing ring of the jar. Then you need to rinse the butter. To do this put the butter in a bowl. Pour a little cold water in the bowl and press the butter with the back of the spoon. Drain it. Keep doing this until the water is clear and you don't get any more buttermilk released when you press the butter.
Keep in the fridge. Use within a week.
Straining the buttermilk
Buttermilk Pancakes
Ingredients
1 egg
1 cup butter milk
1 cup flour
1 tbs brown sugar
1 tbs baking powder
1 tsp baking soda
Directions
Mix the dry ingredients together. In a large bowl, beat egg until fluffy. Add the dry ingredients and buttermilk to the egg. Mix until smooth. Pour 1/4 cup at a time onto hot griddle. I use med-low heat. Flip when pancakes are dry around the edges.
Serve with fresh butter and maple syrup.
Butter milk pancakes
Butter
Ingredients
2 cups heavy cream (aka whipping cream)
cold water
Directions
Fill a one quart canning jar (with a tight fitting lid) with the cream and put the lid on. (Honestly, filling any size jar half full with cream will work) Let it sit at room temperature for 2 hours.
Start shaking it. Shake it until you can't shake anymore and then get your helping hands to shake it. Keep going until it separates into buttermilk and butter. If you're not sure if it's separated yet, keep shaking. when it's ready it will look like a jar you've put 1 cup of butter and 1 cup of skim milk in.
Strain the buttermilk (save it - you'll need it for the pancakes!). I found the easiest way was to put a piece of cheesecloth in the sealing ring of the jar. Then you need to rinse the butter. To do this put the butter in a bowl. Pour a little cold water in the bowl and press the butter with the back of the spoon. Drain it. Keep doing this until the water is clear and you don't get any more buttermilk released when you press the butter.
Keep in the fridge. Use within a week.
Buttermilk Pancakes
Ingredients
1 egg
1 cup butter milk
1 cup flour
1 tbs brown sugar
1 tbs baking powder
1 tsp baking soda
Directions
Mix the dry ingredients together. In a large bowl, beat egg until fluffy. Add the dry ingredients and buttermilk to the egg. Mix until smooth. Pour 1/4 cup at a time onto hot griddle. I use med-low heat. Flip when pancakes are dry around the edges.
Serve with fresh butter and maple syrup.
Monday, November 7, 2011
Sunday, November 6, 2011
Tea anyone?
My little girls bring me joy everyday. Often it's the little things we do together that bring the greatest joy. I'm going to try to share some of that here.
Subscribe to:
Comments (Atom)


