
Saturday, November 17, 2012
Cutting Knit Fabric
I have sewed many dresses for my girls. For some reason or another they never get worn. It wasn't until I started working with knit fabric that they started to pick clothes I've made to wear everyday. One dress in particular I had to make twice because I couldn't coax Tea out of it.
There was a bit of a learning curve though. Trying to cut knits was near impossible for me until I figured this trick out.
Ditch the scissors.
But using a cutting mat and a rotary cutter I don't accidentally stretch the fabric while I'm cutting. Using pattern weights to keep the pattern pieces in place help, but I use whatever I have on hand. Usually my cell phone and a Quilter's ruler will keep my pieces in place.
I definitely recommend trying this trick. It's well worth it.
Thursday, November 1, 2012
Hurricane Sandy
Last year I had to evacuate my home. Irene came through and flooded our basement with over 5 ft of water. We lost a lot in the flood last year. Mostly things that were replaceable but a few things that were not.
This past Sunday, with the threat of another Hurricane looming, I pack up the girls and headed north, to Canada.
Monday was spent in my pajamas watching the news unfold online. It was very emotional to be stuck, helpless, watching the area I have come to call home get devastated.
My father in law is in an area that isn't expected to get their power restored for another 2 weeks. We don't know how long it will be before we see power at our house either. Our neighbor has let us run an extension cord to our fridge from his generator.
As sad as I am that we can't return home for a while yet, my heart goes out to the people who lost everything.
It wasn't until I experienced it that I realized just how awful the experience of flooding is. Where a fire is the heart attack of homes, a flood is like a slow cancer that you see coming but are helpless to do anything to stop.
I have been trying to simplify our home. I'm going to take this opportunity to purge and donate.
Sunday, September 30, 2012
Sewing time

This morning I dragged the family out to the bookstore and picked up Sewing MODKID Style: Modern Threads for the Cool Girl. It was the only book on the shelves that covered sewing with knits, and it's EXACTLY the sort of things I want to be sewing. I've decided I need to overcome this irrational fear of knits.
I couldn't decide which thing to make first. I started with the headband pattern, made it in a solid lilac color. Tea wore it for most of the day. Then I made leggings in an aqua striped jersey I've been saving for leggings. Turns out there was enough to use in a matching "swim suit cover up". I made it in a solid interlock with jersey sleeves and pocket.
This is the first time I've made something and she's been excited to wear it. She asked for another one in pink. A few changes I'll make next time though. She doesn't want a hood. I want her to have something long sleeved. Fortunately the front and back pattern pieces are also the same pieces for several other patterns in the book. This makes it really easy for me to just swap around pieces.
There's also a pattern in the book for a swimsuit. Dahlia has already requested one in black, another in purple and one in green... I'll be busy.
Wednesday, September 12, 2012

Wednesday, September 5, 2012
Tomato Jam

The recipe I used was based on one from Food in Jars
Here is the Original Recipe I had to take out the red pepper flakes because I'm sensitive to them and I omitted the ginger because my husband hates ginger.
Tomato Jam
5 lbs tomatoes, finely chopped
3 1/2 c sugar
8 T lime juice
1 t cinnamon
1/2 t ground cloves
1 T salt
Mix everything together in a large pot. Simmer until the consistency is like jam. It will be very liquid at first. It took me about 2 hours to get it to the consistency I wanted. In the meantime wash the canning jars with warm soapy water. Rinse thoroughly. Put your rack in the bottom of the canning pot, and fill with water, add the jars. Heat to boiling. Put a towel down on your counter so the jars don't crack touching the cold counter. Remove jars when jam is ready. Heat a small saucepan of water to boiling, put the lids (not the rings) in and turn the heat down to low. Fill the jars, leaving 1/4 inch headspace. Wipe the rims with a clean cloth. Apply a lid and ring to each jar, tighten only fingertip tight. Process in the boiling water canner for 20 minutes.
Turn off the heat and wait 5 minutes before removing the jars and putting them on the towel.
Yield - it really depends on how much you boil down the jam. I got equivalent to five 8oz jars.
This stuff is fantastic on burgers, or just a piece of bread.

Tuesday, September 4, 2012
Slime Time!

At the farmer's market I put my name in for a crate of Plum Tomatoes for next week only to get the call mid-afternoon that they had one ready for me to pick up! I promise to post details of what I did with them over the next few days. Right now I want to show you how I kept the girls entertained while I prepped the kitchen for my marathon canning session.

We made slime! It was fairly simple to do, the girls loved it! The texture of this stuff is neat. It can crumble. It also sort of melts. If you roll it into a ball it'll bounce like a rubber ball...
And T thinks it's pretty convincing as snot.

Slime recipe:
1/2c water
1/4c clear glue
1T borax
food coloring in your choice of color
To make put about half of your water in one container (easiest if it has a lid), add the borax. Shake it. In a separate container put the remaining water. Color the water whatever color you want your slime to be. I used two drops each of green and yellow. Add the glue. Mix thoroughly. Slowly, a few drops at a time, add the borax solution. Add a few drops, stir, lift out your stir stick and see your progress. Add a few more drops, stir, repeat. We managed to incorporate all of our glue mixture into our slime.
We played with it again this morning, I stored it in a little jar with a lid. It all sort of melted into one blob in the container. And once I pick up all the little pieces the girls chopped it into this morning it'll do that again.

Friday, August 17, 2012
Fried Chicken

When my Bon Appetit magazine arrived back in February, and it had Fried Chicken on the cover, I tossed it aside filing the idea under "Maybe"
Last night I made it. I took a few pictures while Justin dove in.
When I finally took a bite I realized that I'd been missing out. For my entire life.
It was surprisingly easy to make. I highly recommend it!
Here is the recipe

Tuesday, August 14, 2012
DIY Air and Carpet Freshener

Instead I make my own. This same recipe can be sprinkled on carpets for a carpet freshener. (To use that way, sprinkle on carpets wait a bit and then vacuum it up. It won't harm your carpets, so go ahead and do other stuff and vacuum it up when you get to it. I usually wait 15 minutes, but I've been known to forget about it for up to a couple hours.)

To make this you'll need:
Baking Soda
Essential Oil(s) or Fragrance Oil
A Jar (see note)
A scrap of fabric (see note)
Scissors
Notes: I like to use a mason jar so I can use the ring to secure the fabric, but any jar and an elastic would work.
Sheer fabric works well, you don't want to use anything too tightly weaved or your fragrance won't penetrate it.

Put mixture in the jar. Cover the jar with fabric. Secure with the ring or elastic. Trim the extra fabric. I used pinking sheers to prevent fraying.
Leave out on a counter, shelf, where you want to make smell better. I have one in my bathroom and one in the kitchen.
Carpet Freshener
We only have one room in the house that's carpeted. The girls' room. I like to make this with lavender essential oil for them. Lavender known for it's calming and soothing properties. It's often used in scent blends design to help relax.
To make it as a carpet freshener simply skip the steps about finding a pretty jar and fabric. Mix baking soda and fragrance together. Sprinkle over carpets. Wait a while, give the powder time to work, 10-15 minutes is plenty, longer is better. The baking soda will help deodorize the carpet and the fragrance you choose will scent the entire room. Vacuum up the powder.
When experimenting with your own carpet freshener, I would recommend only lightly fragrancing at first, until you know what your preference is. If you use too much oil it can be over powering.

Monday, August 13, 2012

Saturday, August 11, 2012

Thursday, April 12, 2012
Tent
Chopping down the most prolific plant ever (Rose of Sharon. If you're thinking of planting them don't... seriously....)

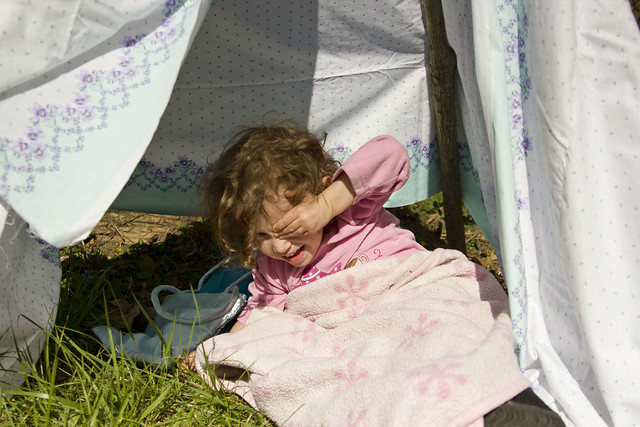
Those are just last year's volunteers. There are literally dozens of these grown to about 8 ft tall around the perimeter of my yard. I've been chopping them down. With the resulting branches I decided to make tents for the girls.
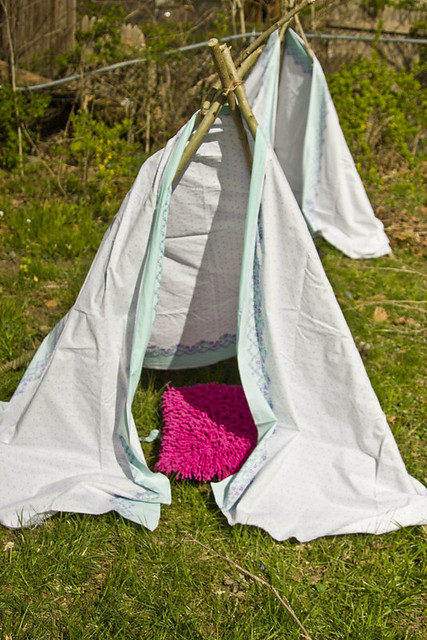
I just lashed four branches together for each one, and then draped fabric over the branches. I'm planning on getting a bit more fancy with the fabric and adding buttons (Trillian asked to be able to close hers) and ribbons (To tie them to the branches.) The fabric comes inside when we're done playing since I don't want it to get ruined by the elements.
They loved them. T told me to leave her alone so she could take a nap.

Those are just last year's volunteers. There are literally dozens of these grown to about 8 ft tall around the perimeter of my yard. I've been chopping them down. With the resulting branches I decided to make tents for the girls.
I just lashed four branches together for each one, and then draped fabric over the branches. I'm planning on getting a bit more fancy with the fabric and adding buttons (Trillian asked to be able to close hers) and ribbons (To tie them to the branches.) The fabric comes inside when we're done playing since I don't want it to get ruined by the elements.
They loved them. T told me to leave her alone so she could take a nap.
Wednesday, April 4, 2012
Happiness
I'm always happiest when I have a project I'm working on.
Right now I'm working on developing a bunch of donut recipes.
So here is my interpretation of happiness:
 Almond donut drizzled with honey
 Chocolate donut with peanut butter glaze
 Lemon donut with Raspberry glaze
Check out our blog circle by going to http://www.laceybphotography.blogspot.com/
Right now I'm working on developing a bunch of donut recipes.
So here is my interpretation of happiness:


Check out our blog circle by going to http://www.laceybphotography.blogspot.com/
Sunday, April 1, 2012
DIY Tanglefree headphones
I made this video for Modcloth's DIY Boss contest. It was a lot of fun to make! I might do a few more to put here.
Saturday, March 24, 2012
Cinnamon Bun Donuts


Ingredients:
1/2 c all-purpose flour
1/2 c whole wheat flour
1/4 c brown sugar
1 t baking powder
1/2 t cinnamon
1/2 c whole milk
1 egg
1/2 tsp vanilla extract
1 tbsp butter, melted
Directions:
Pre-heat oven to 350F.

In a separate bowl mix wet ingredients. Add wet mixture to dry mixture and stir until combined.
Pipe or spoon the batter into a greased 6-donut pan.

Bake 12 minutes
Allow to cool slightly before removing from pan, about 5 minutes.
Cream cheese glaze
1/2 c powdered sugar
1-2 T cream cheese, softened
1 t vanilla extract
1-2+ tsp whole milk
While donuts are baking or cooling, make the glaze by combining powdered sugar, room temperature softened cream cheese, vanilla extract, cinnamon, and milk/cream/water. Whisk or stir to combine, adding the liquid, one teaspoon at a time, until desired consistency is achieved.
Dip the donuts into the glaze while warm (or cool).
Friday, March 2, 2012
Love and Sweetness
I've entered a once a month photo challenge over at Clickin Moms.
Once a month you'll see what I've come up with for the theme we've been given.
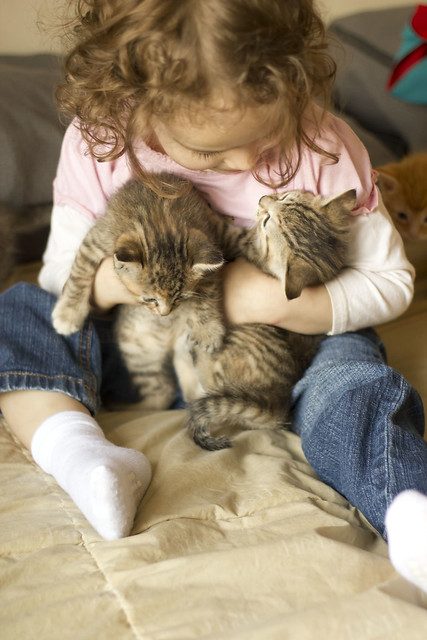
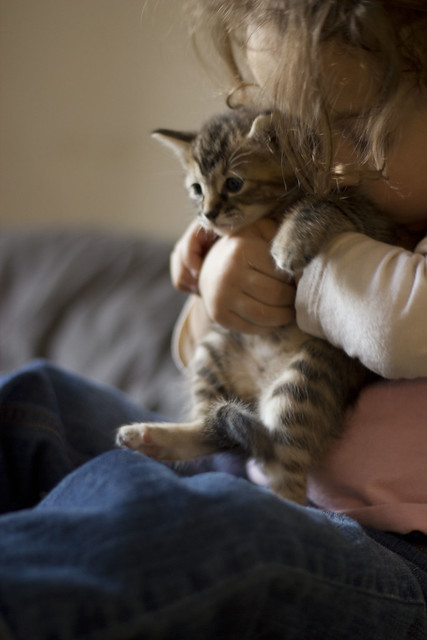
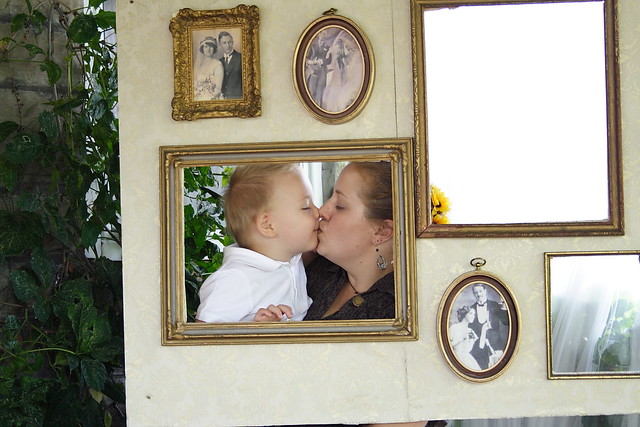
For February our theme was Love and Sweetness.
The theme was perfect timing for us. My sister's cat had kittens! The girls and I made the trip north to visit my mom but of course we made the stop at my sister's house. Trillian was hugging and loving the kittens so much. She even begged "Can I take one home? PLEASE???" As adorable as they are, our house is already at maximum capacity for pets (possibly beyond depending on who you ask).
Check out the other members of our group by clicking through all of our links!
Check out Lacey's Blog next!


Once a month you'll see what I've come up with for the theme we've been given.
For February our theme was Love and Sweetness.
The theme was perfect timing for us. My sister's cat had kittens! The girls and I made the trip north to visit my mom but of course we made the stop at my sister's house. Trillian was hugging and loving the kittens so much. She even begged "Can I take one home? PLEASE???" As adorable as they are, our house is already at maximum capacity for pets (possibly beyond depending on who you ask).
Check out the other members of our group by clicking through all of our links!
Check out Lacey's Blog next!
Monday, February 27, 2012
Peanut Butter Power Bars

Trillian has been a little picky lately. I've been worried about her nutritional needs not getting met. Dahlia eats anything. Trillian on the other hand is on a chicken nuggets diet.
Yesterday I adapted some Peanut Butter Power Bars from one of my favorite cookbooks: Grazing: A Healthier Approach to Snacks and Finger Foods

Peanut Butter Power Bars - Trillian's Giant Cookie
Ingredients:
1/3 cup brown sugar
1/4 cup peanut butter
1/4 cup whole milk
1/4 cup honey
1 t vanilla extract
2 T canola oil
3/4 c whole wheat flour
3/4 c old fashioned oats
1/2 t baking soda
pinch salt
1/2 c raisins
1/4 c slivered almonds
1/4 c hulled sunflower seeds
1/4 c shredded coconut
2 T ground flax seed
Directions:
Preheat oven to 350F
In a large bowl mix wet ingredients (first 6). In a smaller bowl mix flour, oats, baking soda and salt. Add flour mix to wet ingredients, add remaining ingredients and stir until very well blended.
Pat into a greased 8 x 8 pan. Bake for 20-25 minutes until golden.

Thursday, February 2, 2012
New Beginnings
I've entered a once a month photo challenge over at Clickin Moms.
Once a month you'll see what I've come up with for the theme we've been given.
For January our theme was New Beginnings.
So many people make resolutions for the new year. I have been known to do that in the past. What I haven't been known for is sticking to them. So instead of having year long goal resolutions, I aim for daily ones. If I can commit to making good decisions for ONE DAY that's all I need to do.
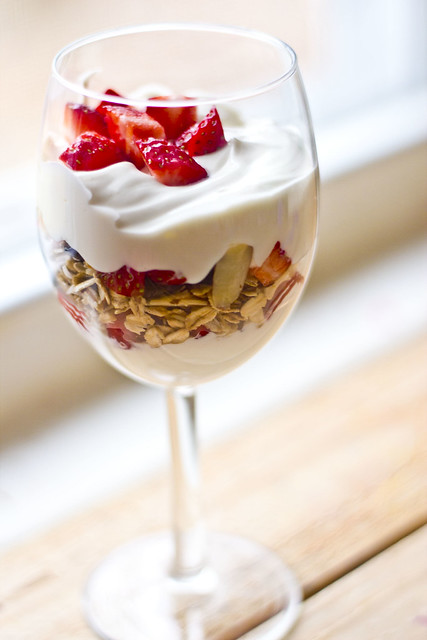
There's one very strong indicator of what kind of decisions I'm going to make in a given day. Breakfast. Sitting down with breakfast gives me some time to think about my goals for the day. When I skip it, I skip that opportunity to reflect on the type of decisions I intend to make. I'm trying to get better about having breakfast everyday. I'm also trying to make sure I'm not just eating poptarts and a cup of joe.
I present my interpretation of New Beginnings
Check out the other members of our group by clicking through all of our links!
Check out Lacey's blog next!
Once a month you'll see what I've come up with for the theme we've been given.
For January our theme was New Beginnings.
So many people make resolutions for the new year. I have been known to do that in the past. What I haven't been known for is sticking to them. So instead of having year long goal resolutions, I aim for daily ones. If I can commit to making good decisions for ONE DAY that's all I need to do.
There's one very strong indicator of what kind of decisions I'm going to make in a given day. Breakfast. Sitting down with breakfast gives me some time to think about my goals for the day. When I skip it, I skip that opportunity to reflect on the type of decisions I intend to make. I'm trying to get better about having breakfast everyday. I'm also trying to make sure I'm not just eating poptarts and a cup of joe.
I present my interpretation of New Beginnings
Check out the other members of our group by clicking through all of our links!
Check out Lacey's blog next!
Sunday, January 29, 2012
Lemon Blueberry Loaf

I love browsing Pinterest. It's my latest addiction. My husband chides me for looking at so much food porn. But honestly it's motivated me to try a ton more recipes in a way that my cookbooks never have. (The only exception here is my Bon Appetit subscription. I love making stuff from those!)
Recently I came across this gem. Since I'm trying to make an effort to reduce my sugar intake this week I was hesitant about making it exactly as is.
So I cut out the syrup and glaze and halved the sugar. I made a few other small changes as well. I added extra vanilla and reduced the lemon zest.

Blueberry Lemon Loaf, adapted from here
1 1/2 cups + 1 tablespoon all-purpose flour, divided
2 teaspoons baking powder
1/2 teaspoon kosher salt
1 cup plain whole-milk yogurt
1/2 cup sugar
3 large eggs
zest of 1 lemon
1 tsp pure vanilla extract
1/2 cup vegetable oil
10 oz blueberries frozen
Preheat the oven to 350 degrees F. Grease bottom and sides of one 9 x 5-inch loaf pans; dust with flour, tapping out excess.
In a medium bowl, sift together flour, baking powder and salt; set aside.
In a large bowl, whisk together the yogurt, sugar, eggs, lemon zest, vanilla and oil. Slowly whisk the dry ingredients into the wet ingredients. In a separate bowl, mix the blueberries with the remaining tablespoon of flour, and fold them very gently into the batter.
Pour the batter into the prepared pan and bake 50 to 55 minutes, or until a toothpick inserted in the center of the loaf comes out clean. Let cool in the pans for 10 minutes before removing loaf to a wire rack on top of a baking sheet.
Friday, January 27, 2012
Apricot and Almond Balls
I've been pinning a lot of recipes lately. I was moved to try making these fruit and nut balls by this pin promising homemade Larabars.
To make them I mixed 1 part dates, 1 part apricots and 1 part almonds. I started with 1/2 cup each but ended up adding more. My food processor is rather large.
They are very sweet and despite my sweet tooth (and no added sugar!) I can only eat one or two at a time. They're about an inch in diameter. I was going to wrap them up in waxed paper like little candies but we ended up eating them all before I got around to it.

Guiness Pie
We had a friend over the day I blogged last. Since then things have gone bananas over here, sick babies etc. I haven't made the time to blog. But here I am now!
The Guiness Pie wasn't as amazing as I'd hoped but I have a few ideas of how to change it. Don't get me wrong, it was good, it could have been better though.

This is the recipe I used. I loved the crust and the general flavors were great. I'd like to try it with roasted garlic in there next time.
The Guiness Pie wasn't as amazing as I'd hoped but I have a few ideas of how to change it. Don't get me wrong, it was good, it could have been better though.

This is the recipe I used. I loved the crust and the general flavors were great. I'd like to try it with roasted garlic in there next time.
Sunday, January 15, 2012
Ever heard of Once A Month Cooking....
I'm not going to get into it that extreme. I do want some options available to us in my freezer. Options that aren't the crappy store bought pizza or lasagnas that never have enough cheese...
Today I'm tackling the recipes I posted on this pinterest board: http://pinterest.com/khoos/food-i-m-making/
Tonight we're going to have the Guiness Pie. I'll come back and let you know how I did tomorrow...
Today I'm tackling the recipes I posted on this pinterest board: http://pinterest.com/khoos/food-i-m-making/
Tonight we're going to have the Guiness Pie. I'll come back and let you know how I did tomorrow...
Wednesday, January 4, 2012
My Top 11 of 2011

There's an awesome contest going on over at Click it up a notch.
They challenge you to find your top 11 images of 2011.
So here I go giving it a try...
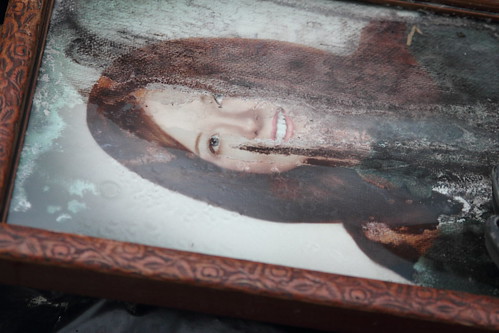
11. Trillian wouldn't give me a genuine smile for most of the year, and it wasn't until the very end of the year that I discovered I could tell her to laugh with me, and do a big fake laugh with her to get a real smile.

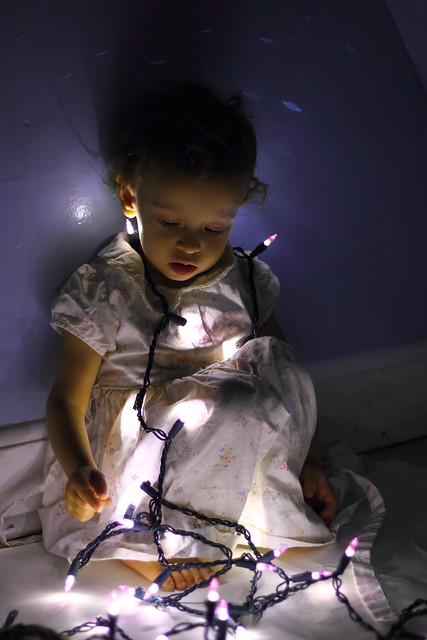
10. We had christmas lights for the first time, so I wanted to play with what happens with them as the light source. I got a ton of great pics of D from this adventure.
9. Dahlia in her Halloween Costume - She loves it so much she still puts it on a few times a week and wanders around our house dressed like this.

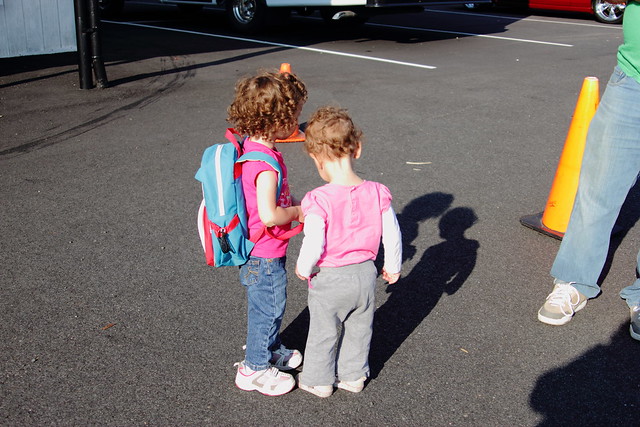
8. Trillian's First Day of School
7. Dahlia is my Climber. She didn't hesitate when she came across this fence

6. My sister and my nephew - My sister NEVER lets me photograph her. I love this shot of them so engaged with each other
5. My darling husband - Since I was in charge of the cameras at my mom's wedding, we made sure to bring ways for Justin to entertain the girls. I love this photo of him.

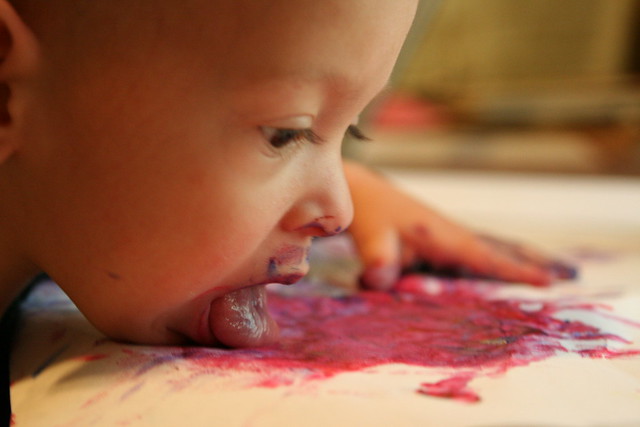
4. Taste the rainbow - As an artist Dahlia thinks outside the box
3. Trillian blowing bubble for Dahlia

2. Dahlia had snuck into the raspberry bush and picked it clean
1.
Subscribe to:
Posts (Atom)